Repair Procedure
Heating Element Replacement
Repair Procedure
Heating Element Replacement
Click on the small images on this page to see a higher-resolution version of the image. The larger image will open in a new window that can be closed after viewing
|
|
| 1 |
Begin by following these procedures:
Remove Cooling tray
Front Cover
Bearing Plate and Drum
Remove Fan
Remove Rear Cover
Remove Top Cover
|
|
| 2 |

|
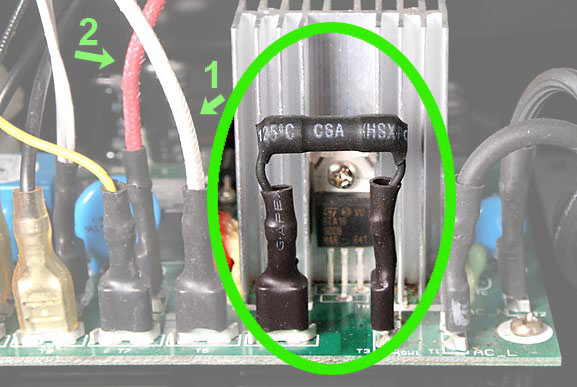
All KN-8828P-2 and KN8828B-2 Hottop Coffee Roasters have this resistor between terminals T3 and T4 as shown here.
CAUTION: If you do not have this jumper-resistor already installed, you do NOT have a "+-2" Hottop, and you must click here and follow THIS PROCEDURE.
|
|
| 3 |
|
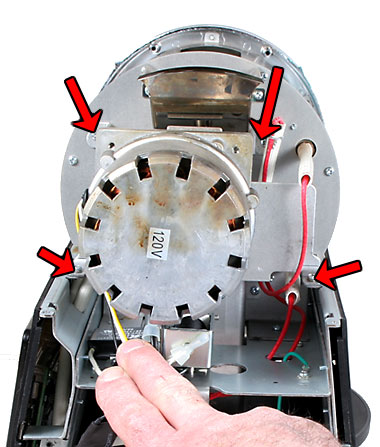
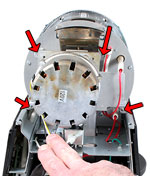
Follow the directions to Remove the Motor. It is NOT necessary to completely remove the motor. Just the 4 screws holding the motor's mounting bracket to the machine. No wires need to be removed. Looking at the rear of the machine, move the motor off to the left to revel the fusible link. Do not allow the motor to hang by its wires. If you cannot safely support the motor either get assistance or remove it completely.
|
|
| 4 |
|
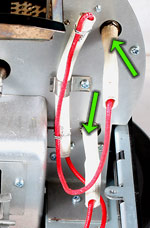
Remove the two wires connected to the heating element.
NOTE: Over time there has been some variation on the colors of some of the wires. The wires you will be dealing with may be red or may be white. So long as you chose the correct wires as identified by their connection points the color of the wires does not matter.
|
|
| 5 |
|
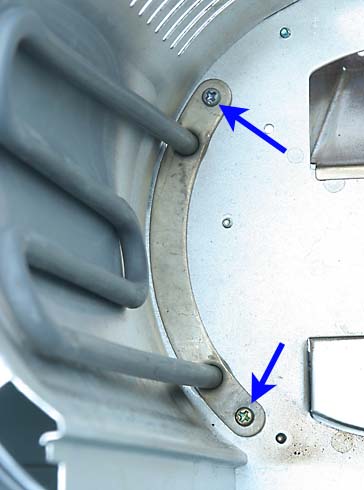
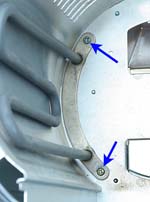
Remove the two Phillips head screws indicated in this photograph from inside the roasting chamber that secure the heating element. Pull the heating element out through the roasting chamber.
Install the new heating element and fasten in place using the new screws included with the element.
After tightening the screws, and before continuing, check that the Heating Element is aligned in the roaster. It should be parallel to the outer roasting Chamber wall. If there is any doubt, refer to the Heating Element Alignment Procedure page to verify alignment and how to correct it if there is a problem.
|
|
| 6 |
|
Replace the two wires removed in Step 3 which were connected to the heating element. The position of the may be reversed from the positions shown here (ie. in this case, the red one may be on the upper connection and the white may be on the lower connection). Take care to not scrape or damage the insulation of the wires.
IMPORTANT: Be sure to check that both spade connections on the heating element are tight. If loose, remove and use a small pair of pliers to carefully squeeze the female spade clips closed a bit and check for proper fit again. Use caution when pushing on the heating element's attachment points.
|
|
To complete the procedure:
Replace the Motor
Replace the tie wrap(s) on the wires leading to the main board
Replace Top Cover
Replace Rear Cover
Replace the Main Fan
Replace the Drum and the Bearing Plate
Replace Front Cover
|