Repair Procedure
Roasting Drum
Repair Procedure
Roasting Drum
Click on the small images on this page to see a higher-resolution version of the image. The larger image will open in a new window that can be closed after viewing
|
|
| 1 |
|
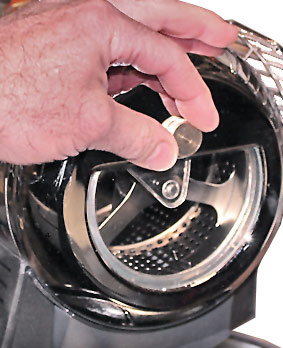
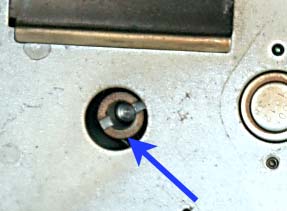
Remove the chaff tray. Hold the Front Cover of the machine with one hand and fully loosen the Gold Screw by turning it counter-clockwise until the Front Cover can be removed. Place it off to the side.
|
|
| 2 |

|
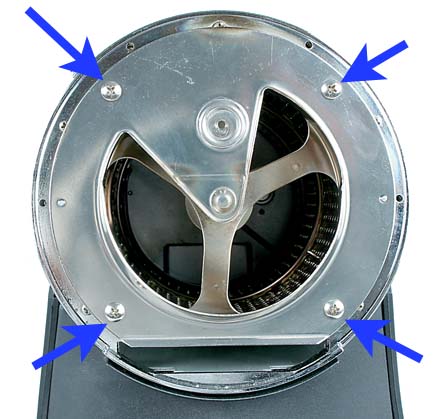
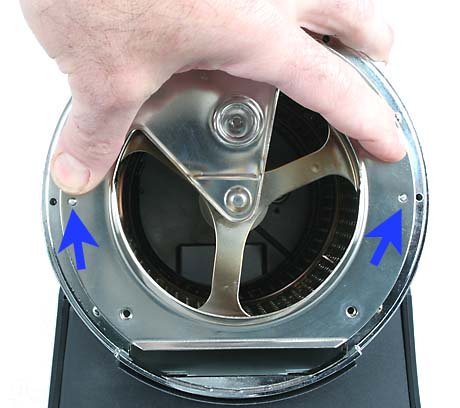
Remove the four screws that hold the bearing plate on the face of the machine. Only remove the four screws as indicated here. The bearing plate can now be removed from the machine.
|
|
| 3 |
|
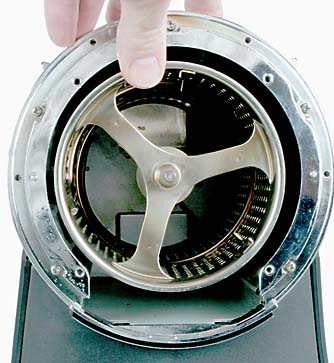
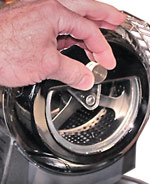
The drum is now exposed and ready for removal. It pulls straight out, but it is heavy, so support it so that it is parallel to the sides of the roasting chamber. Grasp the drum support and rotate the drum back a forth a little will help free it from the drive motor's shaft. Do not drop the drum!
|
|
| 4 |
|
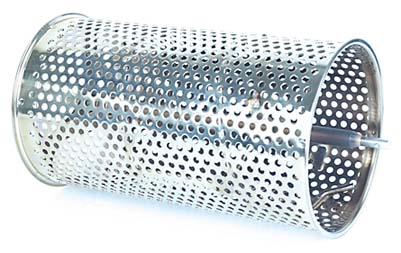
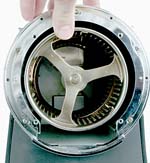
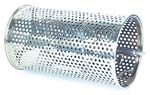
Here is the drum.
|
|
| 5 |
|
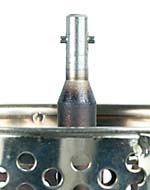
To replace the drum, first take note of the drive end of the shaft shown here...
|
|
| 6 |
|
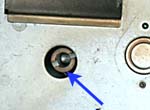
That pin slips into a slot in the drive shaft of the drum's motor as seen in this picture. Carefully insert the drum into the roasting chamber, guiding the drum's shaft into the motor's drive. Turn the drum back and forth until the pin aligns with the slot and the drum can be moved all the way back into the roasting chamber. The face of the drum will be roughly parallel with the face of the machine when it is fully inserted.
|
|
| 7 |
|
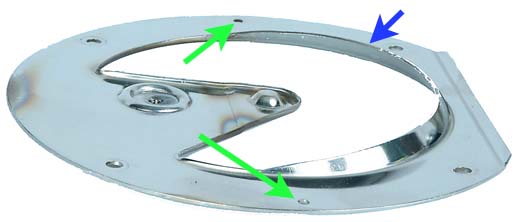
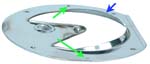
Place the Bearing Plate on the face of the machine. The flange, indicated here, faces OUTWARDS! Be sure that the drum's shaft is seated in the bearing dimple in the center of the bearing plate. The bearing plate is kept in alignment by two pins on the face of the machine, The two holes indicated by the green arrows indicated here...
|
|
| 8 |
|
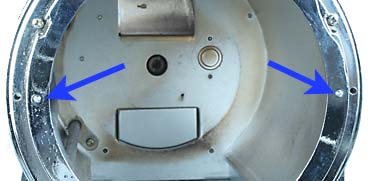
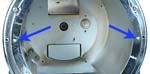
...must align with the two pins indicated by the blue arrows here.
|
|
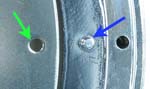
| 9 |
|
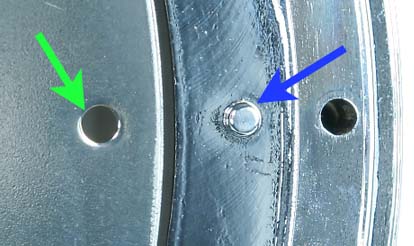
These pins must go through the alignment holes in the bearing Plate. Here is a closeup of one hole in the bearing plate (green arrow), and its respective alignment pin on the front bezel (blue arrow).
|
|
| 10 |

|
Hold the plate against the face of the Coffee Roaster being sure that both pins are in place and the drum is in the bearing hole, and insert all four screws by hand. Be sure the alignment pins are in place and tighten the four screws. Do not over-tighten the screws!
|
|
| 11 |
|
Reinstall the Front Cover and tighten the Gold Screw just until it is snug in place. Reinstall the Chaff Tray. As the next roasting session begins, readjust the Gold Screw as described in the Owners manual.
|
| 12 |
With the machine reassembled IT IS VERY IMPORTANT to follow our drum alignment instructions to verify that the drum is properly aligned in the roast chamber. Failure to do so may result in a damaged drum motor! |