Click on the small images on this page to see a higher-resolution version of the image. The larger image will open in a new window that can be closed after viewing
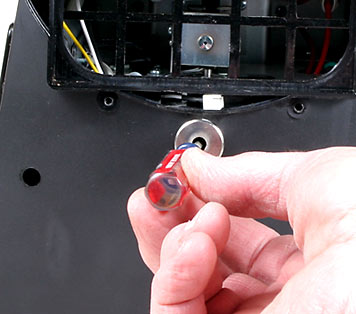
Loosen and then remove the screw that holds the Emergency Eject Knob using a small, slotted screwdriver. Pull the knob out of the machine and set it aside.
3
The Knob is held in place by a special screw. This is not a standard hardware screw so keep it in a safe place.
4
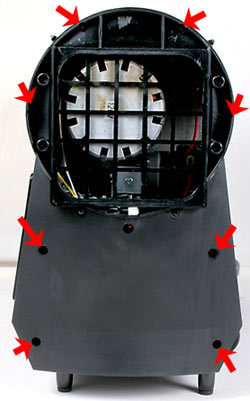
Loosen and then remove all eight screws as indicated here. Laying out a towel on the workspace before beginning helps keep screws from being lost if dropped.
5
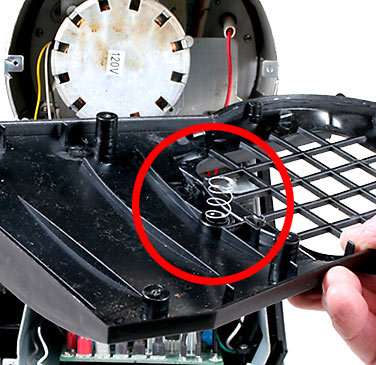
When the screws have been removed swing the back off to the side taking care not to lose the Emergency Eject Return Spring shown here which should be lifted out of its retaining well and set aside. Free the Main Fan's wiring harness from the opening in the grill.
6
When replacing the Rear Cover, first feed the Main Fan Wire Harness and connector through the same opening shown in the previous step. Replace the Emergency Eject Return Spring in its retaining well. Hold the Rear Cover in place making sure that it is properly aligned all around its perimeter. Replace the Emergency Eject Knob and loosely tighten its screw. Insert and loosely tighten all 8 screws. When all screws are in place and Rear Cover is properly aligned, tighten the screws. Do not over-tighten! Snugged into place is sufficient.