Click on the small images on this page to see a higher-resolution version of the image. The larger image will open in a new window that can be closed after viewing
1
NOTE: After the Top Cover has gone through numerous heat and cooling cycles it can change shape a bit. This can make it more difficult to realign when replacing the screws. When replacing the cover it is best to have an assistant handy to hold the cover in place while the screws are replaced.
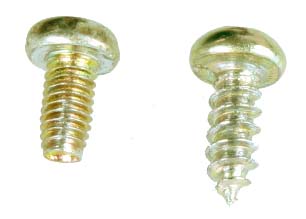
Take note that there are two styles of screws which look similar- machine screws as shown to the left, and self-tapping screws as shown on the right. If you are also disassembling other parts of the machine, take note which you have removed and make sure they go back into the same locations.
3
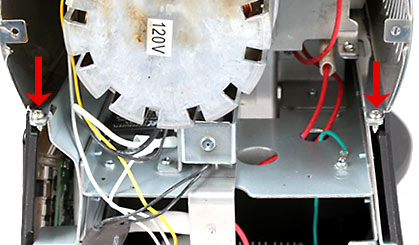
Remove the two screws indicated here at the rear of the machine. There are sometimes not perfectly vertical. Take note of that as reinstalling them will be easier.
4
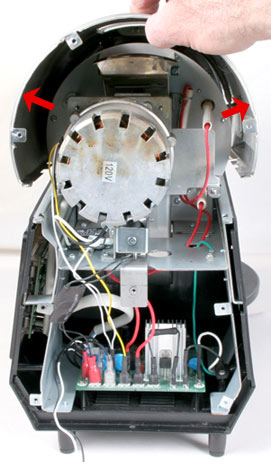
Stretch the sides apart a bit (indicated by the two arrows) to enable the cover to be lifted off the machine, being careful not to catch any wiring.. Take care not to scratch the cover and place it off to the side.
CAUTION: Glves are recommended. Be careful of sharp edges!
5
To reinstall, move the Top Cover into place, aligning it along both sides, and make sure that the front edge of the Top Cover is in place under the Bezel. Replace the two screws removed in Step 2 above, turning them in about half way. Verify that the cover is properly aligned before tightening the screws.