|
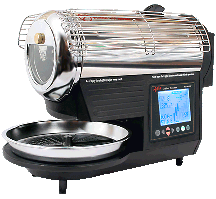
Hottop Americas
Hottop Coffee Roaster
Troubleshooting Guide
|
|
|
Hottop Americas
Hottop Coffee Roaster
Troubleshooting Guide
|
|
|
POSSIBLE CAUSES
|
POSSIBLE SOLUTIONS
|
|
| The roaster will not start and/or and no lights come on at all. |
· Roaster not plugged in. · No power to outlet. · Chaff tray not cleaned after last roast. · Fuse on main circuit board is blown (KN-8828 only). · Fusible thermal link is bad. · Resistor on terminals SW1 to SW2 on new style fusible link bad. |
· Check that roaster is plugged in. · Verify that the outlet is working by using a different appliance or a lamp. · Try another outlet. · Remove chaff tray, empty it, and replace the tray. · Refer to our Fusible Link test procedure. · Contact support@hottopamericas.com for diagnosis. · Go to our Online Store to purchase replacement parts. |
| The machine dumps the beans before the roast completes and without warning. |
· Eject controlled by programming. · Faulty main fan. · Faulty electronic control. |
· The roaster reached the programmed maximum time or target temperature and automatically ejected. User should program higher target temperature or greater target time. · Disconnect main fan and try an empty roast (no beans). If the roast now works properly, replace the fan. · Contact support@hottopamericas.com for diagnosis. · Go to our Online Store to purchase replacement parts. |
| Machine starts normally, but never gets hot, but everything else seems to work properly. Ejection door opens and closes quickly at start of roast. |
· Bad fusible link. · Bad heating element. · Faulty electronic control. |
· Check or Replace fusible link. · Check or Replace heating element. · Test heating element circuit. · Contact support@hottopamericas.com for diagnosis · Go to our Online Store to purchase replacement parts. |
| The beans eject just a few seconds after I add them. |
· Faulty main fan. · Faulty electronic control. · Voltage Problem (go HERE) · Electrical interference in area or through the outlet. |
· Try roasting in another outlet. · Disconnect main fan and try an empty roast (no beans). If the roast now works properly, replace the fan. · Contact support@hottopamericas.com for diagnosis. · Go to our Online Store to purchase replacement parts. |
| The Coffee Roaster does not get hot. |
· Heating element or electronic control is bad. · Fusible link has failed. · Electrical interference in area or through the outlet. |
· Eject beans and try roasting in another outlet. |
| Ejection trap door opens and closes quickly at start of roast. |
· Chaff Tray not inserted fully. · Chaff Tray deformed and not engaging switch. · Chaff Tray switch bad or misadjusted or cable bad or disconnected. · Faulty electronic control. |
· Remove and insert chaff tray. Listen for "click" of chaff tray switch. · Remove chaff tray and bend sides outwards to make the tray slightly wider. · Contact support@hottopamericas.com for diagnosis help. · Go to our Online Store to purchase replacement parts. |
POSSIBLE CAUSES |
POSSIBLE SOLUTIONS |
|
| The roaster seems to take longer to roast than it use to. |
· Change in line voltage · Roaster needs cleaning · Heating Element needs alignment · Main filter not installed · Top filter has shrunk of is damaged · Heating element is failing. |
· Check voltage at outlet or use another circuit. · Remove and clean drum and clean roasting chamber. · Adjust heating element so it is away from chamber wall (See this page) · Reinstall the main filter. · Replace top filter · Replace the Heating Element. |
| There is a brown, watery liquid dripping from the machine | · Moisture from the coffee being roasted is condensing. |
· Beans naturally contain water. Wipe up liquid after roast concludes. Our research shows that this moisture does not get onto any electrical parts and causes no danger. Do not place roaster on a towel or other flammable surface. · Do not store roaster in cold areas such as garage or other unheated spaces in cool weather. |
| There are a few black, burnt beans mixed in with the roasted batch. |
· There were beans stuck in the drum from the last roast that were roasted a second time. · Some of the beans were quite large and got stuck. · Some of the beans were excessively oily. |
· Clean drum out after each roast and remove any stray or stuck beans. · If drum is excessively oily or has excessive build up of coffee residue clean the drum following instructions in the owner's manual. Also refer to our video on cleaning a dirty roaster. |
| There are a few green, unroasted beans mixed in with the roasted batch when roast is completed. |
· Green coffee beans were mixed in after the roast. |
· Be sure cooling tray is empty before roast ejects. · If you use the same container for the green and the roasted coffee, be sure it is empty before pouring in the roasted beans. · When loading beans at the signal to begin the roast, be sure that all beans slide into the roasting chamber and that there are no beans left sitting in the chute. |
| There is chaff left on the beans after a roast. |
· Chaff is a normal by-product of the coffee roasting process. · Roasting chamber not sufficiently cleaned after the last roast. |
· Clean drum to allow chaff to pass through more easily. · After roast ends, clean the roasted beans in a colander or other similar container. · Clean the stray chaff from the roasting chamber as described in the manual. |
| The coffee is roasted too light. |
· The roast level or time is too low. · Amount of beans too great. · Voltage might be low. |
· Add more time to the roast (see manual). · Use a smaller amount of beans. Decrease by 10 grams at a time until proper roast is achieved. · Test line voltage with proper voltmeter or plug the roaster into a different outlet for next roast. |
| The coffee is roasted too dark. |
· The roast is too long. · Too much coffee being roasted. |
· Use less roast time (see manual). · Manually eject the beans at the desired roast level. · Use less beans. Decrease the amount of beans by 10 grams at a time until proper roast is achieved. |
| The coffee tastes bad. |
· Low grade or stale coffee. · Improperly roasted coffee. · You don't like that variety. · Not enough coffee for the amount of water. · Coffee too fresh. · Problems with the brewing equipment. |
· Use a different bean or different bean supplier. · Roast to a different roast level (lighter or darker). · Change the coffee-to-water ratio when brewing. Use more or less coffee per cup. · Let coffee rest one or two days or more after roasting before use. · Use another brewing device or follow cupping instructions in manual. |
| The coffee tastes smokey and burnt. |
· The coffee was roasted too dark. · Coffee is stale. · Clogged rear filter. · Inoperative main cooling fan. |
· Use a lighter roast level or less time. · Use fresher coffee. · Replace rear filter. · Check main fan. · Contact support@hottopamericas.com for diagnosis help. · Go to our Online Store to purchase replacement parts. |
| The roaster produces a lot of smoke. |
· Coffee roasting produces smoke. |
· Smoke production is normal when roasting coffee. Use Hottop Coffee roaster with adequate ventilation as described in the owners manual. · Attempting to roast too dark. |
POSSIBLE CAUSES |
POSSIBLE SOLUTIONS |
|
| When I start a roast it immediately goes into cool down mode and turns off after a short time. |
· Chaff tray not inserted into machine · Chaff tray not engaging the safety switch · Chaff Tray Safety Switch not connected or not functioning properly · New control panel needs to be set for the machine |
· Insert Chaff Tray fully into machine and listen for the mechanical "click" of the switch. · Bend edge of Chaff tray so that it depresses safety switch when inserted · Check Chaff Tray Safety Switch connection on rear of Control Panel · Slide Chaff Tray in and out and listen for the 'click' of the switch. · Contact support@hottopamericas.com for further diagnosis. |
| The beans do not eject at the end of the roast. |
· Ejection door jammed. · Ejection solenoid faulty. · Faulty electronic control. |
· If the beans are roasted to the level you desire, press the "EJECT" button. · If eject button on control panel does not work on KN-8828B-2K and "P-2K" and "B-2" and "P-2" models, pull the emergency eject button on back cover below the main fan. · If the machine stops and the beans are still in the roasting chamber, first allow machine to cool completely! Disconnect power cord from wall outlet and then remove front and pour out beans. Use a suitable tool and push on ejection door to free it. See this diagram for part location · If the eject door is not jammed, discontinue use. Solenoid is probably faulty. · Contact support@hottopamericas.com for diagnosis · Go to our Online Store to purchase replacement parts. |
| When the machine signals I pour in the beans and they pour right out again. |
· Beans stuck in ejection door. · Ejection door spring weak. |
· Remove drum and use a suitable tool to free stuck beans in ejection chute. Use tool to push door all the way open a few times and allow it to slam closed to clear obstruction. See this diagram for part
location. · If door doesn't close properly, spring is probably faulty. · Contact support@hottopamericas.com for diagnosis. · Go to our Online Store to purchase replacement parts. |
| The control panel illuminates and the roaster heats up, but the motor makes no sound and the drum does not turn. |
· Drum motor is bad. · Drum motor wiring damaged. · Drum motor disconnected from main board. |
· Contact support@hottopamericas.com for diagnosis and possible motor replacement. |
| Roaster starts, and the motor can be heard, but the motor seems to not engage and then catch and/or make grinding noises, and the drum rotation is irregular. | · Gear box is likely faulty (integral part of drum motor). |
· Refer to our Drum Rotation Problem page. · For further diagnosis refer to the Noise Diagnosis Page. · Replace Drum Motor · Go to our Online Store to purchase replacement parts. |
| The roaster makes noise, but the drum isn't turning. |
· Drum is jammed. · Main motor is bad. · Drum Motor's gear mechanism is bad or jammed. |
· Refer to our Drum Rotation Problem page. · For further diagnosis refer to the Noise Diagnosis Page. · Remove roasting drum and clean ends of drum, roasting chamber, and bearing plate. · With drum out, restart roaster to see if drive coupling (in center of back wall of roasting chamber) now turns. See this diagram for part location DANGER: - DO NOT reach into roasting chamber when doing this test. IMMEDIATELY stop machine and unplug after doing this test. DO NOT run for more than two or three seconds. WARNING: heating element will be VERY hot after doing this test (See this diagram for part location), even after one or two seconds! · If motor shaft turns, clean the drum and reinstall. If it still does not turn, then go to our Online Store to purchase replacement parts. for motor replacement. |
| The roaster makes grinding or scraping noises or laboring sounds. |
· Front bearing improperly adjusted. · Foreign matter between drum and roasting chamber. · Foreign matter in front bearing. |
· Start with our complete Drum Alignment instructions page for detailed instructions on aligning the drum. · For further diagnosis refer to the Noise Diagnosis Page. · Remove drum and clean the roasting chamber, ends of drum, and the inside of the bearing plate. · Clean the end of the drum's shaft and the bearing plate where the drum's shaft rides. |
| The beans eject but the agitation arms do not turn. |
· Agitation arms jammed in cooling tray. · Agitation arm motor inoperative. |
· Remove cooling tray and rotate arms manually to be sure they are free. Remove any impediments found. · Remove cooling tray and without adding any beans to roaster, start a roast, then immediately hit the eject button. Look to see if agitation arm motor shaft is turning. If not, Contact support@hottopamericas.com for diagnosis and/or replacement. |
| The beans are being ejected early. |
· Rear filter is clogged. · Main fan is dirty or failing. · Insufficient roast time programmed. · Too large of a roast load of beans. · Faulty electronic control. · Temp sensor disconnected. · Safety point reached. |
· Replace main filter (try this first before attempting other solutions). · Clean or replace main fan. · Try using a longer roast time or higher roast level. · Use a smaller load of beans (try 225 grams). · Contact support@hottopamericas.com for diagnosis of electronic problems or for the procedure to reconnect temp sensor. · Listen for beep signal and press a button (other than "Eject") to continuie roast. |
| The beans eject but the tray spins around with the agitation arm. | · Locating pins are worn off the Cooling Tray Base. | · Replace the Cooling Tray Base with updated part which uses metal locating pins. |
| Sometimes the Cooling Tray Agitation Arm reverses direction | · Agitation Arm gets stuck on beans. | ·The Agitation Arm motor has a built in reversing gear that is designed to do exactly that. This keeps the motor from being damaged and ensures that agitation continues to cool the beans as efficiently as possible. |