Click on the small images on this page to see a higher-resolution version of the image. The larger image will open in a new window that can be closed after viewing
1
Begin by following these procedures:
Fan Rear Cover Bearing Plate and Drum Top Cover Motor- (Only remove the 4 retaining screws and move motor to the side- the motor does not need to be completely removed from the machine.)
2
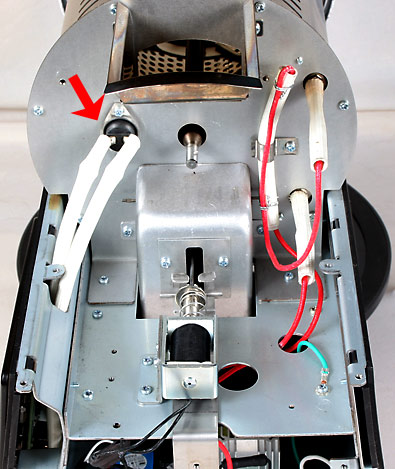
When those procedures have been completed the thermal sensor is easily accessed as shown here.
3
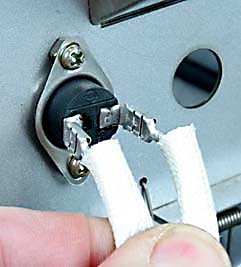
Begin by pulling back the insulating sleeves, one at a time, to reveal the push-on connections.
4
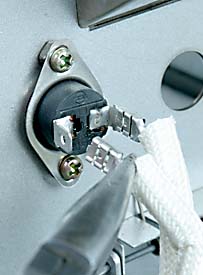
Use a needle-nose pliers to carefully pull off the connectors- pull only on the connectors and not on the wires! Work carefully so as not to damage the wires and to avoid pulling the other end of this wire off the control panel!
5
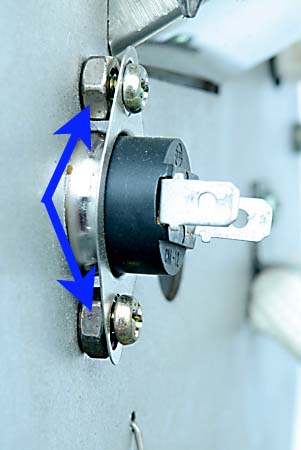
Use a Phillips head screwdriver and remove the two screws. Note that nuts are used as spacers between the sensor and the panel on which it is mounted. These will fall out when removing the screws. Be sure to catch or retrieve them if dropped..
5
Replacement is the reverse of removal. Be sure to place the spacer nuts are in place! Small pliers or tweezers can be helpful during this procedure. Do not tighten the screws until both nuts are in place and both of the screws have been started. Tighten the screws evenly until snugged into place. Do not over tighten the screws!
Replace the wire and pull the insulating sleeves back into place. Be sure no other wires have been displaced or pulled off.