Click on the small images on this page to see a higher-resolution version of the image. The larger image will open in a new window that can be closed after viewing
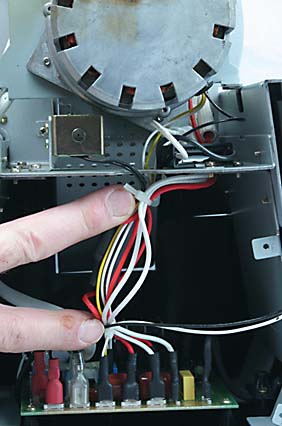
Begin by cutting the two tie wraps holding the wire bundle together above the main circuit board, Discard the clippings (Do not leave them in the machine).
3
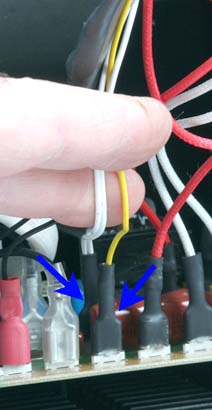
Use needle nose pliers to remove the two motor connectors from the main circuit board as indicated here. Pull only on the connectors themselves- do not pull on the wires! Wiggling them a bit will help loosen them. Take care to not scrape or damage the insulation of the wires.
4
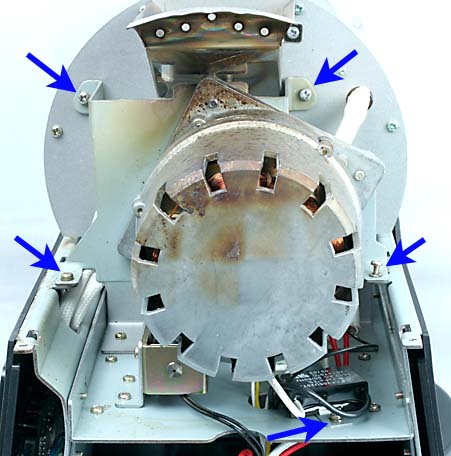
Remove the 4 Phillips head screws indicated in this diagram. Support the motor as you do this. It is heavy, so do not let if fall.
5
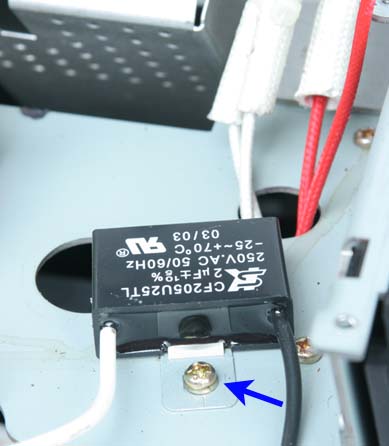
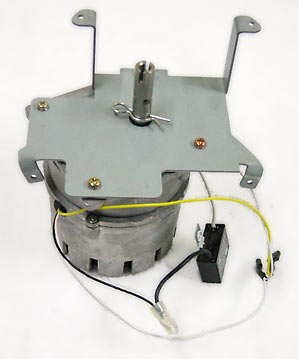
Move the motor off to the side and remove the one Phillips head screw holding the motor capacitor in place. Pull the wires though the hold in the panel and the motor assembly can now be removed from the machine.
6
The replacement motor comes as a complete assembly. Run the wires through the hole in the plate to the main circuit board. Replace the capacitor using the original screw being sure not to pinch any wires as you tighten the screw. Attach the motor's mounting plate to the machine, making sure the lock washers are in place. Be sure all the wires are correctly routed and there are no wires pinched beneath the motor's mounting plate and install and gently snug all four screws before tightening them.
7
Re-attach the two wires to the main circuit board (first the connector with the two white wires, then the one with the yellow wire closest to you). Group the wires together and replace the two tie wraps to hold them in place. Do not over-tighten the tie wraps. Snip off the wraps' excess.
With the machine reassembled IT IS CRITICAL to follow our drum alignment instructions to verify that the drum is properly aligned in the roast chamber. Failure to do so may result in a damaged drum motor! Damage thus caused is not covered by our warranty.