Repair Procedure
Eject Mechanism & Solenoid
Repair Procedure
Eject Mechanism & Solenoid
Click on the small images on this page to see a higher-resolution version of the image. The larger image will open in a new window that can be closed after viewing
|
|
| 1 |
Begin by following these procedures:
Fan
Rear Cover
Bearing Plate and Drum
Top Panel
Motor
|
|
| 2 |
|
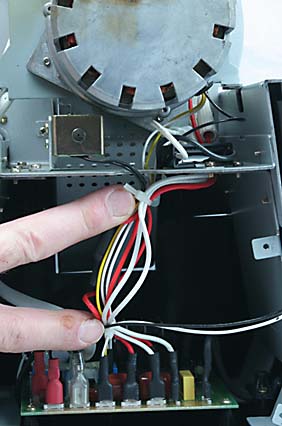
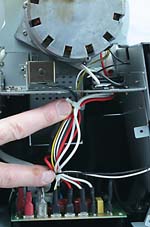
Clip the tie wraps that hold the wire harness together.
|
|
| 3 |
|
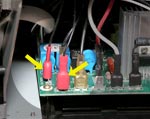
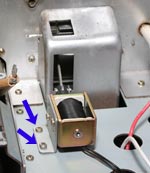
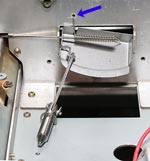
Remove the two wires from the Main Board at T11 and T12 that power the solenoid indicated here. Before removing, note the routing of the wires from the Solenoid to the Main Board. Use needle nose pliers and grip only the red portion of the connector. Do not pull on the wires.
|
|
| 4 |
|
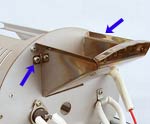
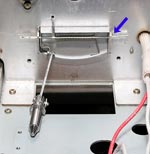
Remove the bean Loading Chute by removing its two retaining screws. One screw is visible in this photo, the other screw is on the opposite side in the same location.
|
|
| 5 |

|
Remove the two wires connected to the Thermal Sensor and move the wires off to the side.
|
|
| 6 |
|
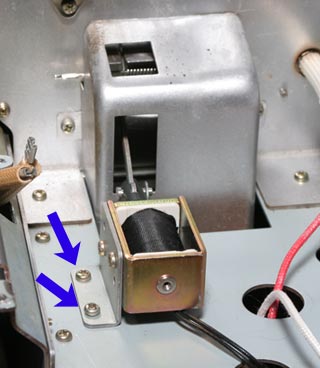
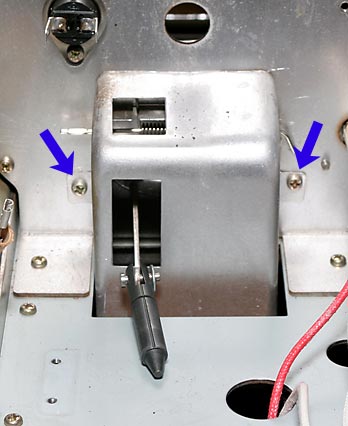
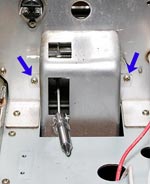
Remove the two Phillips head screws indicated here and slide the Solenoid towards the rear of the machine to remove it. The actuating shaft will remain attached to the Ejection Door.
|
|
| 7 |
|
Remove the two screws holding the ejection chute and slide the chute upwards to remove it from the machine.
|
|
| 8 |
|
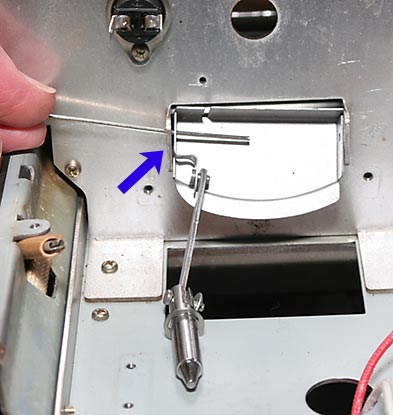
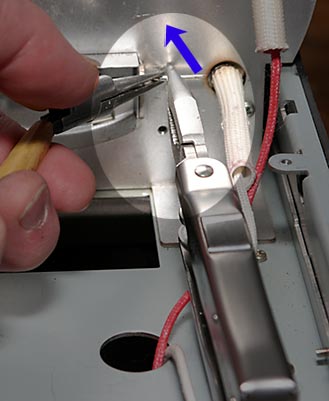
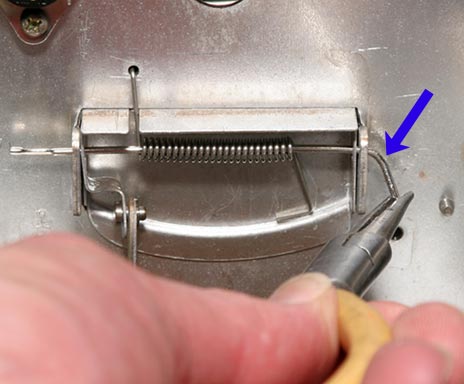
Use a suitable pair of pliers and straighten the hinge pin at the location shown here. If you choose, the pin can also be cut off with a pair of wire cutters. While holding the door use the pliers to slide the pin out and remove the door, pin, and spring.
WARNING: Be sure to retrieve all parts from the machine before proceeding.
|
|
| 9 |

|
Begin assembly by holding the replacement door in position and sliding the new hinge pin into place through the first set of holes as shown here.
|
|
| 10 |
|
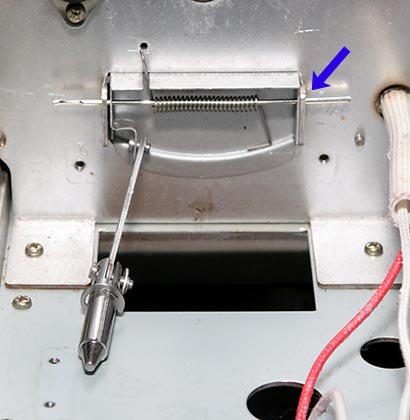
Slide the spring onto the hinge pin and insert the hooked end through the hole in the roasting chamber's rear wall as indicted by the arrow.
|
|
| 11 |
|
Align the other side of the Ejection Door and slide the hinge pin through the second set of holes. Verify that the spring is in the position as shown here.
NOTE: Pull on the actuating shaft a few times to be sure that the door is moving freely before proceeding.
|
|
| 12 |

|
Using two pairs of pliers or other similar tools, bend the free end of the hinge pin to a 90 degree angle. Create the bend approximately 1/4" (7mm) away from the pivot point.
|
|
| 13 |
|
Replace the bean Ejection Chute by sliding it down through opening and fasten it with the two screws (indicated here) removed earlier. Locate the actuating shaft as shown here.
|
|
| 14 |
|
Replace the Solenoid Coil by sliding it over the Actuating Shaft and replace and tighten the two screws removed in step 5 above.
|
|
| 15 |
|
Before proceeding, manually operate the solenoid to be sure that the mechanism is operating smoothly and that the spring is holding the Ejection Door firmly.
|
|
| 16 |
|
Replace the Bean Loading Chute
|
|
| 17 |
|
Replace the two wires connected to the Thermal Sensor. Be sure that the connectors make a firm connection on the spade terminals of the Thermal Sensor. If necessary, use a pair of pliers to close the female spade connectors slightly to assure a firm connection.
|
|
| 18 |
|
Replace the wires for the Solenoid on the Main Board at connection points T11 and T12
|
|
To complete the procedure:
Replace the Motor
Replace the Top Panel
Replace the Rear Cover
Replace the Fan
Replace the Bearing Plate and Drum
|
|
|
WARNING!: Before roasting coffee, turn roaster on as if to start a roast, and then IMMEDIATELY hit the EJECT button DO NOT ADD COFFEE BEANS FOR THIS TEST! Failure to do so may result in a fire hazard!
|
|