Click on the small images on this page to see a higher-resolution version of the image. The larger image will open in a new window that can be closed after viewing
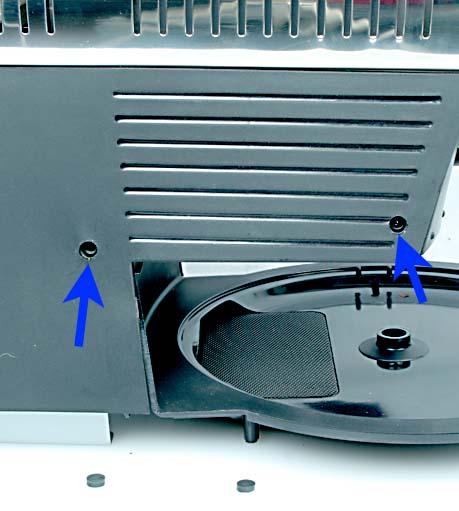
To remove the Cooling Tray Base, the left side panel (when facing the front of the machine) must be removed. This is the side that DOESN'T have the control panel. There are two screws hidden behind the two rubber lugs as indicated in this picture. Use a suitable tool and pry the plugs out. The backside of the plugs is coated with a sticky substance that keeps them in place. Put them aside in a clean environment so as not to pollute the adhesive.
3
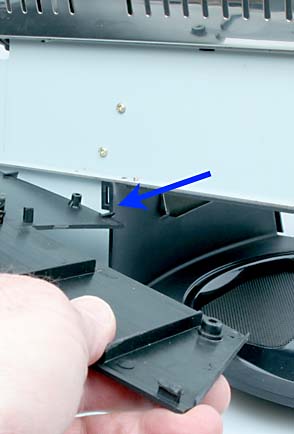
Remove the two screws behind the plugs and the side panel can be pulled away from the machine, freeing the cooling tray base from the machine. The arrow indicates the slot and tab that held the Tray base in place.
4
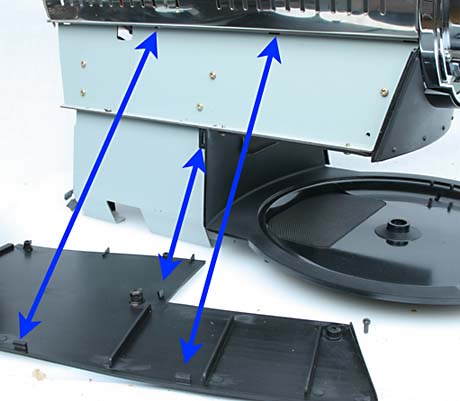
When replacing the Cooling Tray Base, be sure to engage the tabs on both sides of the Tray Base discussed in Step 2, as well as the tabs that locate the side panels onto the machine.
5
REASSEMBLY
Replace the screws in the following steps, but do not fully tighten.
a - Replace the Base and verify that the various mounting tabs of the Side Panels are properly engaged with the base and metal framework.
b - Replace the Rear Cover.
c - Verify that all panels have been properly aligned, then tighten the various screws while holding the parts in alignment.
Complete the process by reassembling:
Replace Fan Reinstall the rubber plugs.