Click on the small images on this page to see a higher-resolution version of the image. The larger image will open in a new window that can be closed after viewing
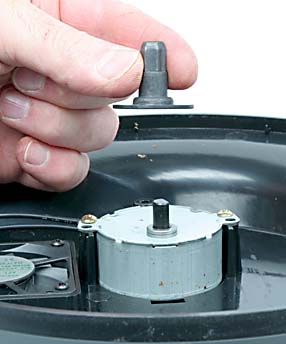
After the base has been removed, pull off the spindle adapter from the Agitation Arm motor and set it aside to keep it from being lost.
3
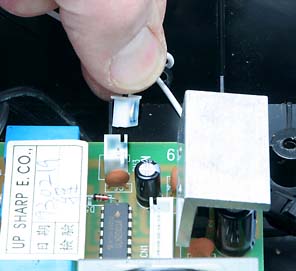
On the main circuit board, remove the polarized connector indicated here. Pull on the connector and not on the wires to disconnect it. If it is tight, wiggle it a bit as you pull.
4
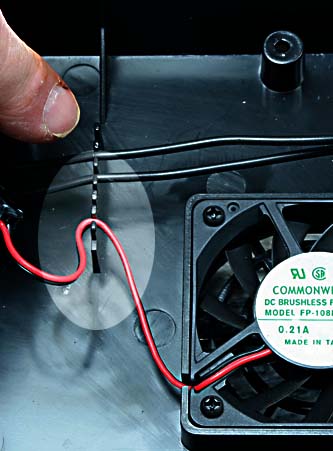
These wires run under the main circuit board around the standoff (take mental note of their routing). They are clipped into the molded-in retainer as shown here. Remove the wires from the retainer by pulling upwards on them near the retainer itself.
5
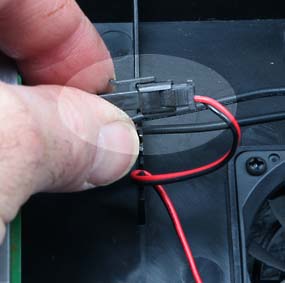
Pull the wires towards the fan to reveal and gain better access to the connection at the end of the red and black pair of wires. Pinch the retaining clips shown here and pull the connector apart.
6
Note that this plug and socket are polarized and will only go together one way. Make note of that as you disconnect it to make reassembly easier.
7
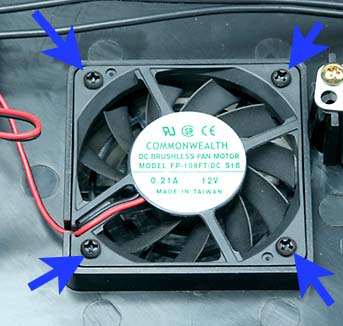
Remove the four Phillips head screws holding the fan to the base and remove the fan.
8
Assembly is the reverse order. Be sure to carefully route the wires back under the main circuit board around the standoff as originally located and install the fan with the label face up as seen above. Reconnect the wire connector to the main circuit board, and remember to replace the spindle adapter on the Agitation Motor's shaft, and then reassemble the machine: