Click on the small images on this page to see a higher-resolution version of the image. The larger image will open in a new window that can be closed after viewing
1
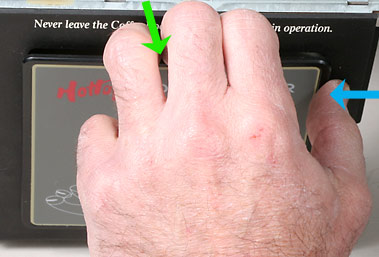
Begin by working a finger under the center-top of the control panel as indicated by the green arrow. Pull at that location while at the same time pushing as shown by the blue arrow. This will flex the panel sufficiently to unhook the first of the retaining tabs along the top of the right side or possibly the tab at the center of the top edge depending on where you are applying the force.
2
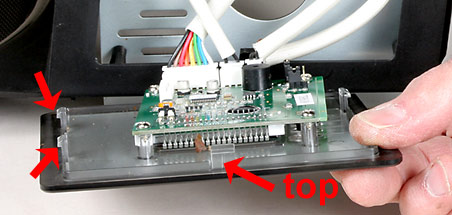
For your reference, here is an image of the tabs in the back side of the Control panel. There is only one retaining tab along the top edge and it is located in the center. There are two tabs along each side and one on the bottom edge. Once the first tab is released, work around the panel to release the right-side tabs. After that, the panel can be easily removed.
3
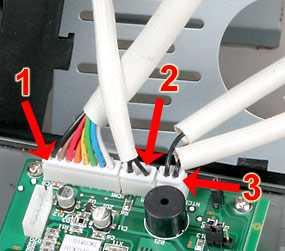
The back side of the control panel has three cables connected. They are numbered here:
1 - Main cable to the Main Circuit Board
2 - Cable connected to the Chaff Tray Safety Switch
3 - Cable connected to the Temperature Sensor on the back wall of the roasting chamber.
Note that these are all different sizes so they cannot be confused, and they are polarized so they attach in one way only.
4
When replacing the control panel on the machine, first be sure that the connectors for each of the three cables are properly attached to the control board. Then snap the panel back into place, starting at the bottom, then working up along the sides, and finally snapping the top into place.